Flowerpot drawing and pencil shading tutorial part -2
Hello friends, here I have provided very easy tutorial of drawing and shading of a flowerpot. In this tutorial, we will learn how to draw and shading a pot with a pencil. If you are interested in making this type of sketches and shading. I hope this article will be useful for you.
Necessary materials -
- Paper
- Scale
- Pencil
- Sharpner
- Eraser
- Cotton earbuds
- Paper clipboard
First, attach a piece of paper with clip to the clipboard and sharp the tip of pencil after that follow these steps.
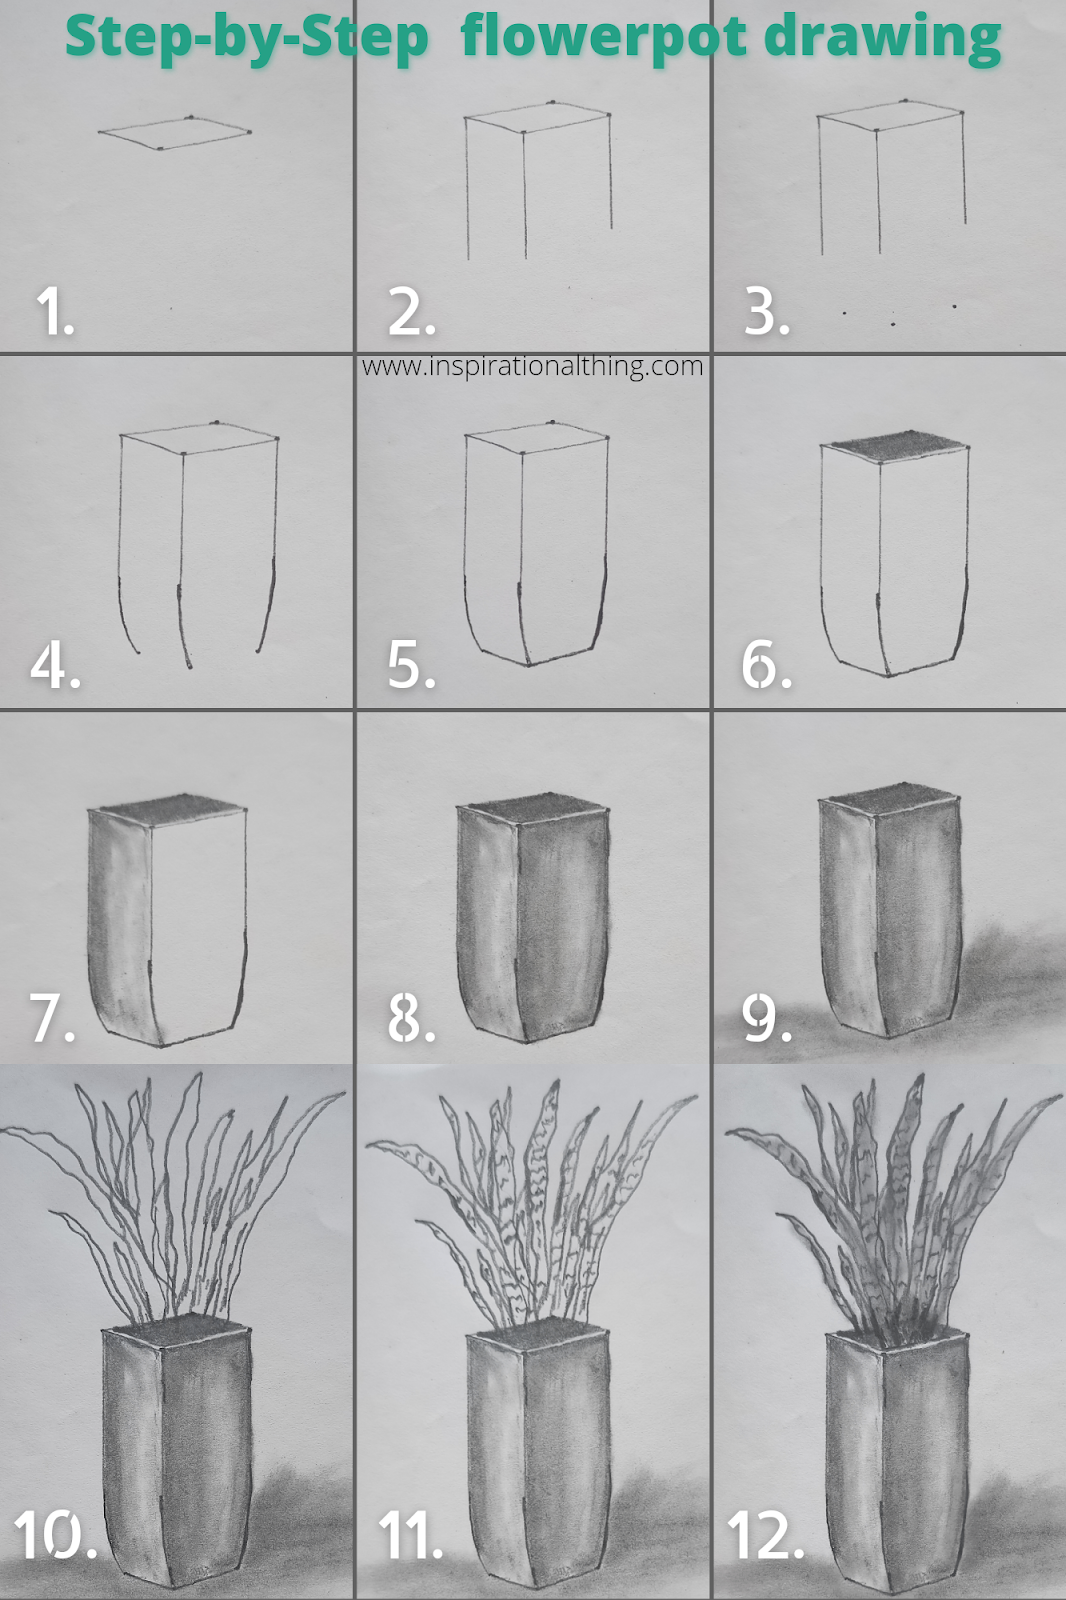
Step - 1 Draw an parallelogram
First draw 4 points, now join these points to form a parallelogram as shown in the figure below.
Step - 2 Draw vertical lines
Now except the top corner of the parallelogram, draw three perpendicular lines from the other three corners.Two perpendicular lines which are adjacent to each other should be of equal length and the length of the third line should be kept slightly less than these two lines. Here we are creating an orthographic view of the pot.
Step - 3 Draw three dots
Make three dots as shown in the picture below. Here two points have been displaced slightly below and slightly to the right of both the vertical lines and the third point has been displaced slightly below the third line and slightly to the left.
Step - 4 Draw curve lines
Join each vertical line and the point below them by creating a curved line. Here two right curve lines and one left curve are to be drawn as shown in the image below.
Step - 5 Make bottom of pot
Now join the points on the lower side of the curved lines by making two straight lines.
Step - 6 Shade the top of pot
Now darken the shape of the upper parallelogram using pencil and cotton earbuds, keeping a little space from both the front lines as shown in the picture below.
Step - 7 Shading the left side of the flowerpot
Darken the left edge and top edge of the left side of the pot with a pencil and spread it well with the help of earbuds. Do not make the rest of the place too deep.
Step - 8 Shading the front face of flowerpot
In this side of the pot, all the edges are to be darkened, only the middle part should look bright as shown in picture below.
Step - 9 Draw shading of base and shadow of the pot
Now using pencil and cotton earbuds, shading the base and shadow of pot as shown in the picture.
Step - 10 Draw a plant
Now make a plant as per your wish.Here I have drawn a diagram of a Dracaena trifasciata plant.
Step - 12 Shading the plant
Lastly, using pencil and cotton earbuds, do the shading of the plant, as shown in the picture below.
Flowerpot drawing and pencil shading tutorial part -2 all 12 steps are provided in the below image.
Congratulations you have made a beautiful flowerpot pencil sketch .I hope you enjoy this article . If you have any suggestions always welcome at comment box.


Post A Comment
Post a Comment